This post contains a collection of pistol shot processes (aka shooting sequence, routine, ritual, etc.) in the hope they can be helpful to other pistol shooters. It started with my own routines and their changes throughout time. It also has examples by other pistol shooters and coaches.
Table of Contents
Ramon Suarez
These are a few of my own shooting routines (also known as shooting sequences and shot processes). I tweak them every once in a while, as my focus moves to new areas after others have been integrated and my understanding and feelings change.
24/03/2020
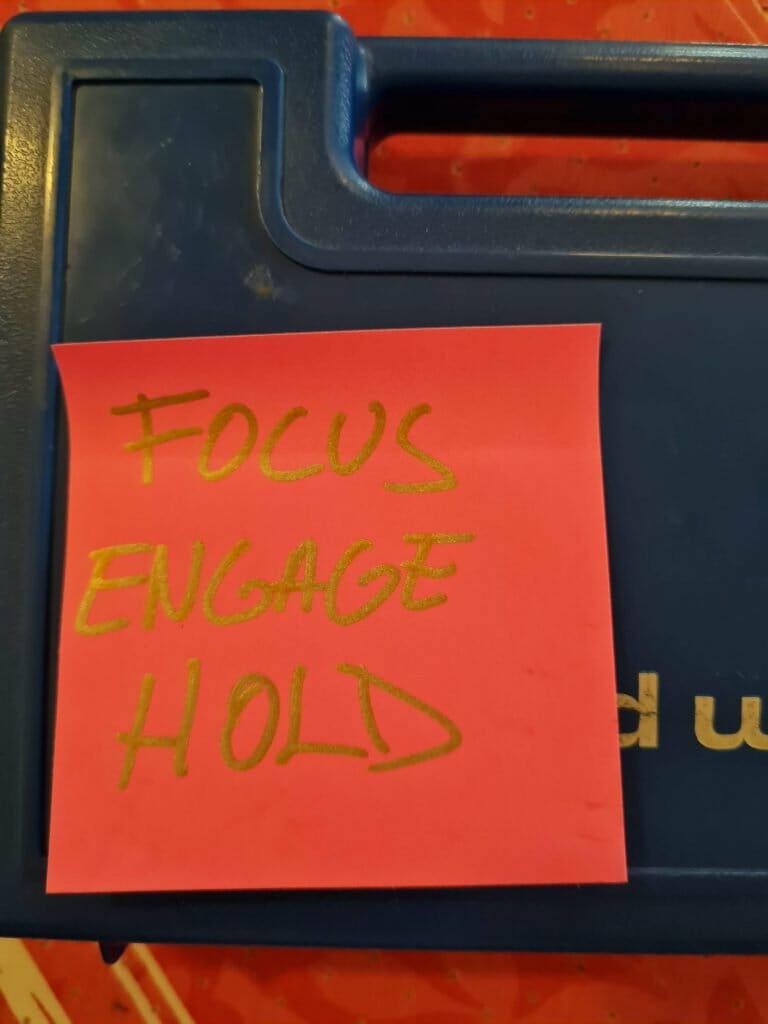
I’ve recently started the Build Your Brilliant Shooting Routine online course by UK Olympic mental coach Paul Hughes and discovered that my previous sequence is what he calls This Is How I Hit. Following his advice and my evolution I have changed my sequence to:
- Focus
- Engage
- Hold
I’m still playing around with this and thinking of expanding the last two points, which would give:
- Focus
- Engage smoothly
- Hold steadily
23/05/2020
For a few days now I’ve moved to a more abstract sequence that I find very helpful:
- Energy
- Breathe tall
- Balance
- Focus
- Trust
Those are the important things to focus on now that the little steps are integrated.
19/11/2019
This is my current single breath shooting sequence:
- I decide that it is time to shoot, this changes my concentration and makes me have a different focus.
- Turn head towards target
- Stretch arm into ready position and check arm feelings and sights without moving head, just lowering gaze, correct if needed (needed a lot).
- Balance check (am I moving too much? things look steady?).
- Inhale and raise gun over target. I’m looking at the target with a lazy focus and feeling my arm.
- Pause.
- Make sure sights are ok.
- Check shoulder is not too up.
- Hold breath and lower gun under control (not too fast, not too slow) looking at front sight, trying to keep wrist lock.
- At end of bullseye reduce speed, take trigger stop and exhale slowly.
- Focus on front sight while going down from bullseye and try to reduce movement.
- Conscious of initial trigger tension in hand and keep on augmenting it when arriving at zone (sometimes it feels too loose and I abort). If I feel it taking too long, I lower my arm and restart (most of the time).
- Follow through, recall feelings and where I think the shot went. I cannot recall the whole shot (almost nothing stays in memory).
- Lower gun.
- Check impact.
When taking position:
- Start from right of the target, perpendicular, looking at target.
- Looking at target walk towards front until I see that I’m well aligned.
- Check feet and place them right.
- Take gun barrel with left hand and place grip against web of right hand.
- Lower back of hand
- Stretch fingers
- Move fingers into position.
- Rest held gun in table
- Look at target and do a few raises to validate position. I’m trying to be aware of where gun wants to go naturally so that it ends centered without me driving it to any side.
- Pivot or move until position is good.
10/1/2019
My new coach has told me to read my ISSF pistol shooting sequence for 15 shots in every training, so I have updated the one I had written following the advice of my previous coach. There are no big changes in the sequence itself, but changes in how I see it now.
- Start looking in front of me.
- Inhale and towards the end turn head and look at top of target.
- While exhaling, raise gun to ready (directly, without adapting). Check that grip is good.
- Check balance.
- While inhaling, raise gun to a bit over the black of the target.
- While exhaling, check that sights are good but looking at target.
- Check balance.
- Smaller inhale.
- Lower arm slowly while exhaling.
- Stop at aiming zone. At the same time stop exhaling, change focus to top of front sight, reach trigger stop.
- When stability starts to be acquired launch shot release.
- After shot is released follow up for a few seconds.
- Lower gun
I keep it in a Google Keep note so that I can read it in my phone, but I’ve found that reading it in a piece of paper is more helpful.
What’s yours like?
Jim Newsome
This is the example shoot process that pistol coach Jim Newsome sends for shooters to complete their first assessment:
- Take grip and settle into position.
- Deep stomach breath to clear mind and lower centre of gravity. Brief
visualisation of prefect sight picture and prefect trigger release. - Empty pause.
- Raise head to look at target, unfocused.
- Begin raise, inward chest breath through nose. Raise to height above
target. - Exhale through mouth, lowering begins, taking up first stage as the pistol
descends - Continuing exhale, pick up sights above target, follow down to aiming
area loosely focused on sight picture or back of hand. - Settle into area of aim, shoulders down.
- Begin to ‘laser focus’ in on foresight. Increase trigger pressure to point of
shot release
10.Continue to focus on foresight, reset to correct picture and call shot.
11.Finish exhale, return gun to table.
Statis’tir
Here’s the routine by Statis’tir shared via Twitter:

Thanks for this Ramon. Not a lot of useful information like this to be found online. I love the final point of Statis’tir’s sequence.
Thanks for the feedback John. It helps keep me motivated to keep on sharing 🙂 What’s your sequence/routine like?